DIY Pumpkin Topiary: It is finally starting to cool down here in FL! We had our first taste of fall weather this past weekend and it got me motivated to decorate just a little! I rummaged through our storage closet and found all of our fall decorations and went to work! Last year I made this Pumpkin Topiary and it was so easy! It is definitely my kind of DIY project! It looks great! Requires few materials and no gluing or nailing or any real tools! and it is easy to store and use every year! You can certainly use real pumpkins for this, but that will require a little more work and $$$, so I recommend the faux pumpkins you can pick up at your local craft store.
It's hot here in FL, so we've been eating a LOT of salad! I've given up on making side dishes and just throw a salad on the plate with the protein. It's good for you, right? and I spend less time slaving over the hot stove - and THAT is good for all in this house when it's hot out! ...and when I say ALL I mean Don, of course, because it is just the 2 of us :)
I was spending big dollars on those chintzy bags of salad, and decided enough was enough! I started making my own bagged salad and it is working out perfectly! I'm saving money and I don't have to worry about contamination such as Cyclospora that recently made nearly 400 people very sick. It was traced back to prepackaged salads. You can read the story here
I got some nice Romaine Lettuce (you can mix your greens, but I tend to be lazy and stick with my fave - good ole romaine), a plastic knife, a cutting board, a colander, a large resealable bag, and a paper towel and went to work. If you have a salad spinner - even better! I need to get one and have been trying to decide between these two:
I am taking recommendations though, so please let me know if you have one you really like :)
Back to making my salad bag (without a salad spinner)...I got my Romaine and my plastic knife and went to work
First I cut off the end... the white hard parts are not good - blech
be sure to use a plastic knife - it helps keep the lettuce from turning brown. You can pick up a plastic knife for under $5! Check this one out
Next I cut the whole thing in half lengthwise because I like smaller pieces of lettuce in my salad - this is a personal preference, so skip this step if you prefer longer lettuce :)
I separated it just so you could see what I mean. I hold the two pieces together and slice thin strips until the whole thing is cut up - like so...
Then it all goes into the colander to get washed - Sprinkle some white vinegar on the lettuce and toss then rinse with water. The vinegar cleans the lettuce and also keeps it fresh longer
My sink is dark so it's not a great spot to take a picture, but I think you get the idea
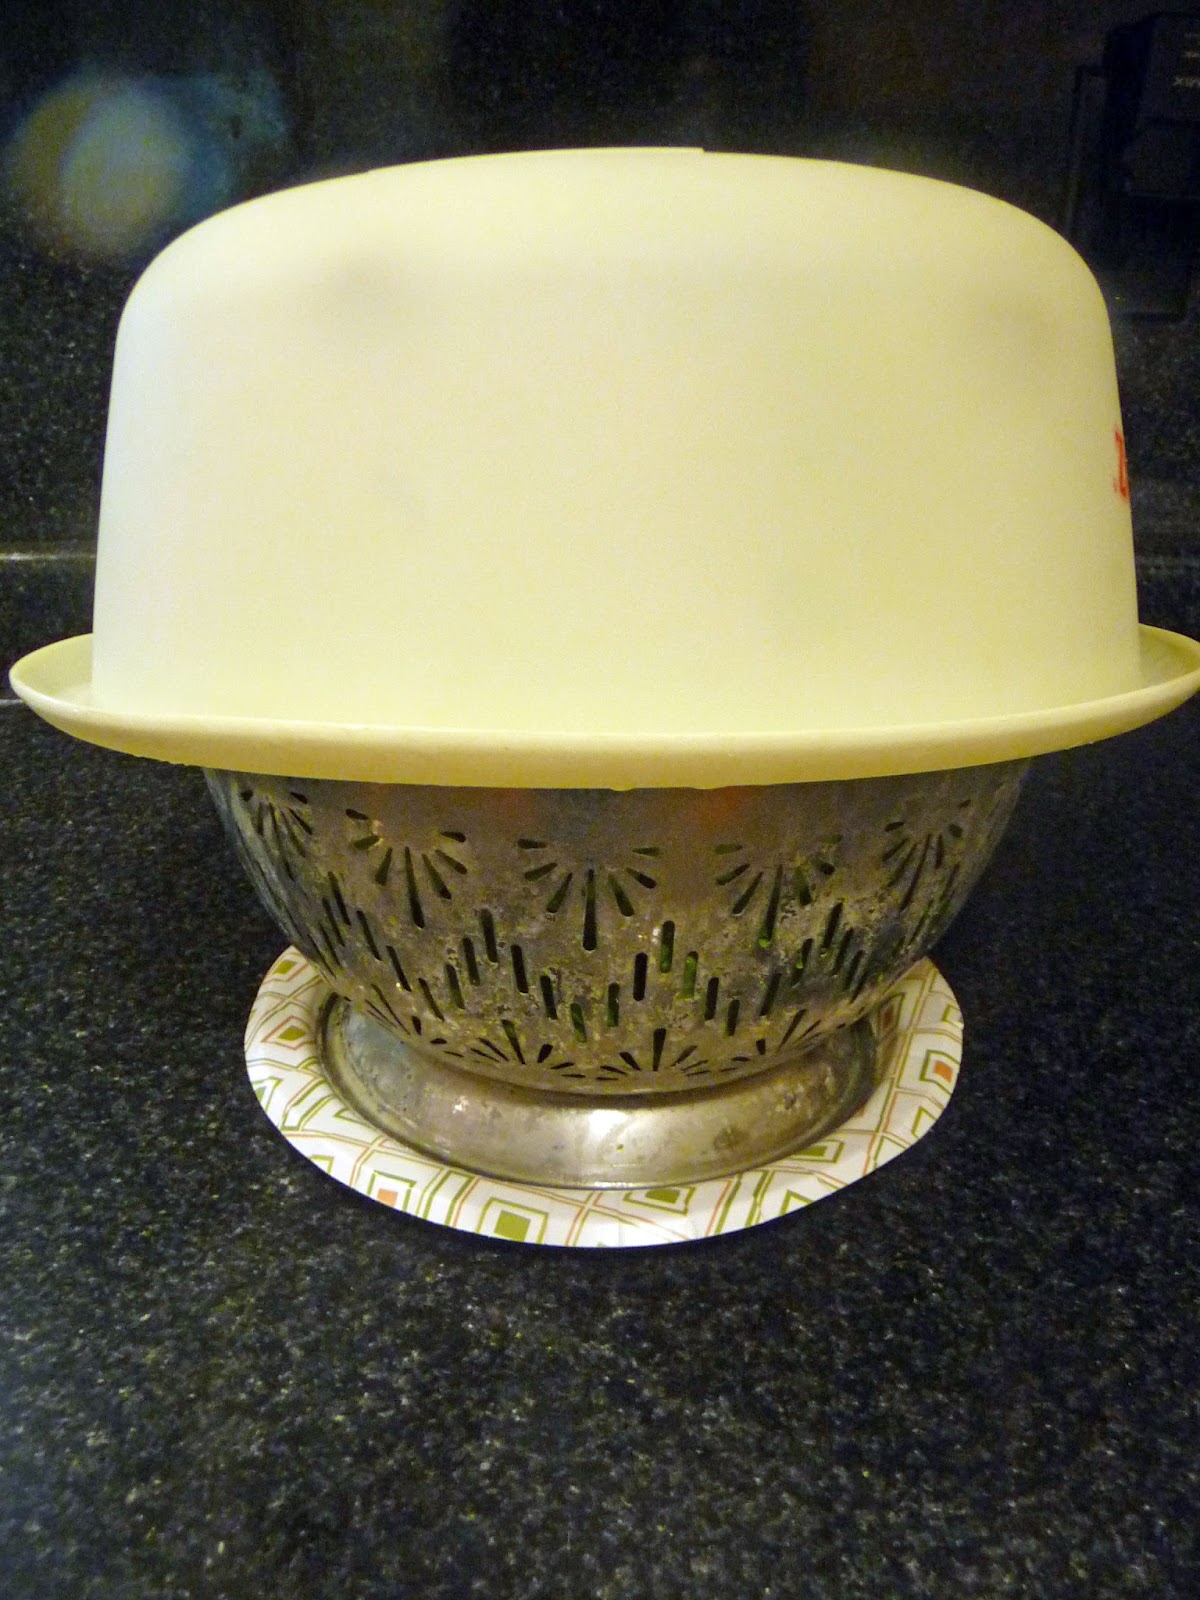
I let it drip dry a while if I have time and then I make my own salad spinner (sort of) - it's pretty sad really, but I will share it with you because it works (sort of)
I get a large plastic bowl and fit it on top of the colander and shake...over the sink! Be sure you hold it over the sink or you will splash water all over the kitchen and that's no fun! It's not important how I know that....
I know it's so ridiculous looking, go ahead and laugh - I do!
Once your salad is as dry as it's going to get, then you can start bagging it up. Get a large resealable bag and place a paper towel on the inside. I fold it in half like you see in the picture....
Now bag up the lettuce...
As you are sealing it up, try to squeeze out as much air as you can...
That's it! It's super easy and doesn't take long to do at all!
Store in the fridge and this should last you at least a week. We eat up this amount of salad in just a couple of days, so I haven't needed to replace the toweling, but if your salad sticks around more than a couple days you might want to swap out the towel once or twice with a fresh, dry one.
While Madison was home for spring break, we set out to organize her many, many boxes of horse show ribbons. She had a great idea to display them in a vase, so we went to TJ Maxx. They had SO many choices of glass vases in all shapes and sizes! Very affordable too! All I knew was I HAD to have a lid to keep the dust out. There is no way I was ever going to take those ribbons out and dust them, so a lid was necessary!
It was a little tough to settle on one, but this is it...
We gathered all of her show ribbons from the early years...
and we got to work....
well, Madison got to work, I mostly watched :o)
What a great afternoon this was! We found show ribbons dating back to 2001! Her very first horse show ever was at the Funny Farm. She was in the Walk class on Sweet Sue and won ALL blue ribbons! and that is how she acquired the horse showing bug! The bank account was always empty after that...thanks to horse showing
Sweet Sue & Madison back in 2001 - toooo cute!
We also found ribbons from her very first out of town show! Again, on Sweet Sue at the Greater Orlando Hunter Jumper Association show. Great memories!
(that show is when I realized how much horse shows can break the bank! WOW! That bill was a shocker!)
We found ribbons from her first show with her very own horse - Shameless!
First show with Shameless in Jacksonville - Big Winners!
Her first 4-H show ribbons, and so many more great memories!
First 4-H Show with Shameless - lots of Blue!
We done good! I am so happy with how the ribbon display turned out!
...and we still have ribbons leftover! Time to get another vase!
Madison picked up another vase to hold ribbons from 2 very special horses - Carlos and Jordy. Carlos was a 4 year old German Warmblood given to Madison after a tragic trailer accident took the life of her beloved jumper. EWSZ, Inc. donated Carlos to help Madison move past the tragedy. Madison loved working with Carlos - they learned a lot from each other, and being the sweetest horse ever, he really did help her through such a horrific time in her life. If you are in the market for a beautiful, talented horse with a great mind (who isn't?), definitely check out the website!
Jordy was a lease horse from Tri-Color Stables. Jordy is a great jumper! Madison had so much fun with Jordy. She learned so much from him and was very successful showing him. Working with Angie was wonderful as well. It was our first time ever leasing a horse, and we were fortunate to have such a great experience thanks to Angie! You can see A jumping video of Madison and Jordyhere.




.jpg)


